Use this simple tutorial to create a DIY skull vase using craft skulls and faux flowers, moss, and feathers. Add it to your Halloween table setting, haunted-home decor, or as part of a spooky holiday mantel!

IDEAS FOR YOUR SKULL VASE
Okay, I’m not one of those Halloween fanatics who sets out their spookiest decor as soon as September 1st hits (but hey, no judgment here if you do….). However, we’ve had some cooler weather lately and it has me at least thinking about Halloween a little early this year.
Maybe it’s because one of my boys will be two and finally old enough to enjoy dressing up and trick-or-treating this year. I’m sure he’ll also love the decorations that I’ll eventually set out, but keeping him from destroying (or eating) them is a whole other challenge. My bet is that everything I set out this year will have to be out of his reach.
One decoration that is trending right now is the faux floral skull.
Sure, you can purchase these (I’ve seen a couple at craft stores for around $20+ and better quality ones on Etsy for $40+). Or, you could make it a DIY project and customize it yourself.
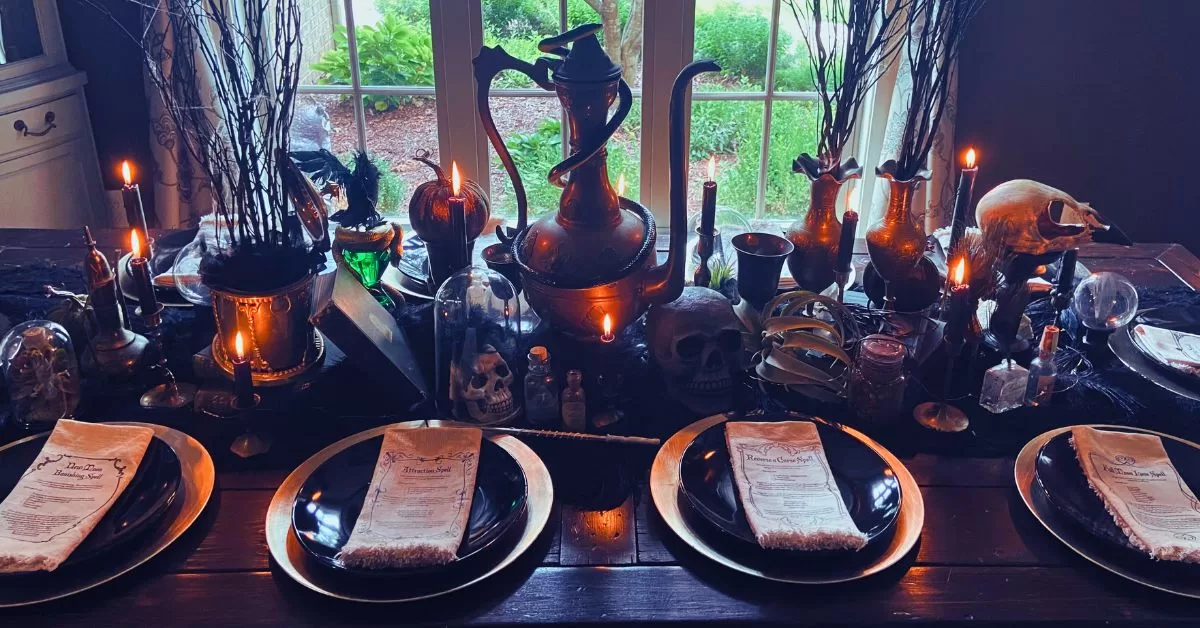
I’ve created larger faux floral skulls for centerpieces, but this time used smaller skulls for a table setting idea. You can see the original post here, where I experimented with five fall table settings and provided shopping lists for each.
I went with a black and purple color scheme to match my black stoneware, glasses, and flatware, but you can easily customize with your own choice of faux stems, succulents, moss, or feathers.
Another option is to paint your skull black, gold, or any color of choice to coordinate with your greenery and match the rest of your decor. One of you out there will add glitter, I just know it!

SUPPLY LIST FOR DIY SKULL PLANTER
- Craft skulls – these are approximately 4 inches x 5 inches, which is around the size I used for my table setting decor, however larger skulls can be used for centerpieces
- Exacto knife, box cutter, or another cutting tool that you can manipulate safely through plastic
- Foam, cut into small blocks
- Miniature faux flowers, succulents, moss, or feathers
- Floral wire cutters
- Hot glue
- Optional: vase filler or anything to give a little weight to the skull to prevent it from tipping over
- Optional: paint, paintbrushes, and yes, even glitter
DIRECTIONS
- Cut a hole in the top of the skull. My craft skull was about 5” wide, so I made the hole roughly half that diameter. Be careful with the cutting! The skull is rounded and mine had thicker plastic, so I took it slow and steady to avoid slicing a finger open.


- Fill the foam with foam. Smaller pieces are easier to stuff and the foam will give the stems some stability. You can also fill your skull with something heavier for balance (the weight of the greenery may cause it to tip over if it’s hollow and lightweight). I’ve used rock vase fillers for this with larger ones.
- Assemble your feathers, greenery, and flowers. Use wire cutters to cut away excess stems. I started with the tallest pieces and then worked my way down, ending with the moss around the base. Hot glue to secure.

TIP: Spread your fillers out so it doesn’t look like a thin sprig of flowers sprouting out of the top of the skull, but rather an overflowing bouquet growing from the inside out and covering the majority of the top of the skull.
I hope you found some Halloween decorating inspiration with this DIY craft. I plan to do a Halloween home tour next month to show you all the fun decorations that my boys will love (and hopefully not tear down)!